Machine vision and measurement systems
Santa Margarita’s machine vision and measurement systems are based on the self-developed StM Measuring Core development platform. Several product applications have been developed with the development platform, StM Surface, StM Dimension, StM Control, StM Text, StM Color and StM Xhance.
Products are different applications of the same system that can be easily combined as needed. Santa Margarita’s measurement systems are used in machine vision quality control in several industries such as wood, mining and construction. Santa Margarita’s measurement systems are used not only in machine vision systems, but also in X-ray imaging and LIF and XRF analysis in the mining industry.
Design and piloting
An essential part of a successful machine vision project is the proper shooting arrangement. A good shooting arrangement consists of the selection of suitable lighting, camera, optics and placement to support lighting and camera shooting. Santa Margarita have a solid experience in designing imaging arrangements. We will be happy to learn about your quality control issue and share our own solution and plan.
The suitability of a machine vision system for a quality control object can often be tested and verified by a pilot project. All of Santa Margarita’s vision and measurement systems are based on our own development platform for StM Measuring Core measurement systems. The platform offers ready-made, versatile methods for the implementation, analysis and calculation of various imaging and measurement arrangements. Our platform solution is highly scalable, both for devices connected to it and for its performance. This allows for piloting on a smaller scale, for example, using only a portion of the width of the entire production line. Our good equipment base and good relationship with camera and lighting suppliers often provide the opportunity to run a pilot project without heavy equipment costs. From Santa Margarita, you get a pilot project quickly and cost-effectively.
StM VeneerProfiler – Stripe-Camera
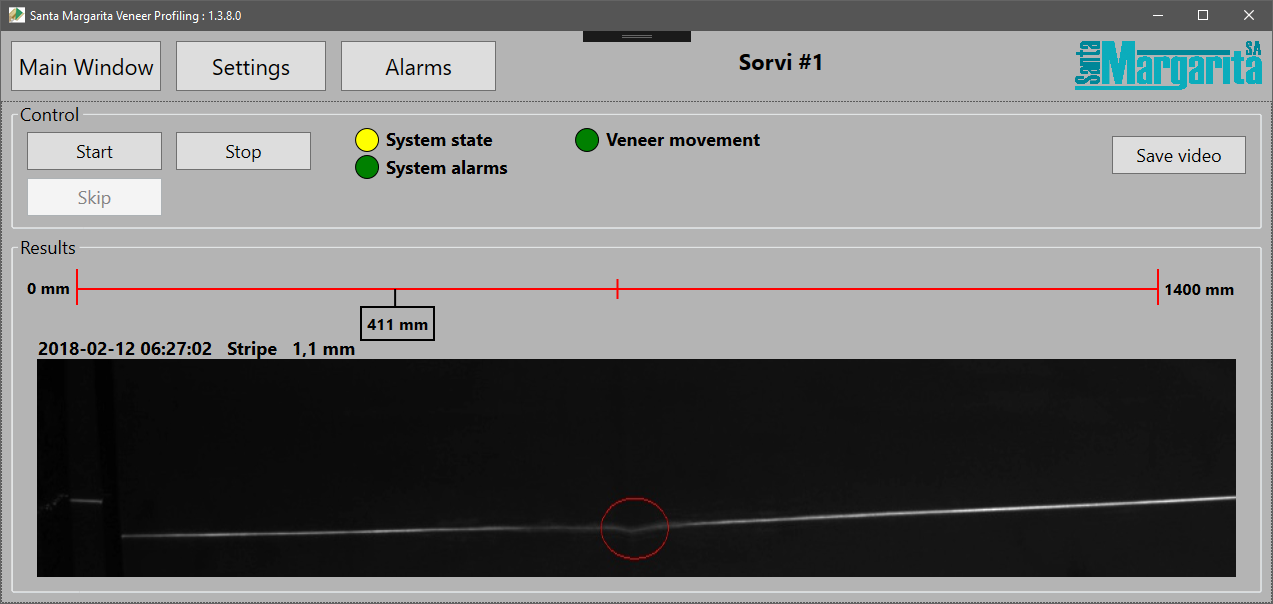
StM VeneerProfiler – Stripe-Camera is a machine vision system that detects surface defects in veneer wood. The system monitors the surface of the veneer in real time and detects anomalies about the surface of the material about three times per second. When system recognizing the anomaly, it alerts automation system and, if necessary, stops the line. The camera is installed in the immediate vicinity of the wood peeling machine. The Stripe-Camera is based on a laser vision system, that is easily connected to any automation system. If necessary, two lasers can be installed in the system, so the detection works as widely as possible. System flexibility enables small-scale piloting or large-scale production capabilities.
Instead of wasting raw materials and production resources, you can save more veneer on the end product that can be sold at full cost.
Stripe-Camera maximizes output in resource efficiency and best quality in the final product.

StM Sapwood Control
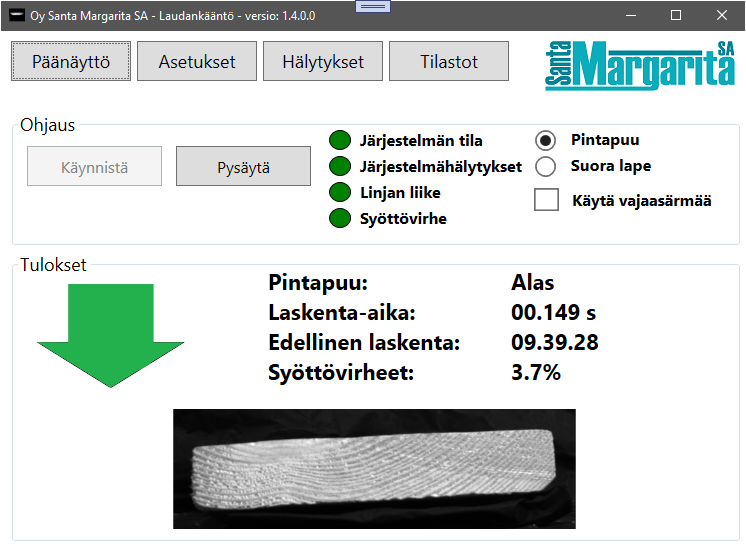
StM Sapwood Control is a product based on Santa Margarita’s Measuring Core development platform, which uses machine vision to monitor the surface direction of the board in real time and the consequent need to turn the board.
The end of the board is described in real time as the board passes the line. StM Sapwood Control application analyzes direction of the wood from image. The result and image are displayed on the touch screen. Information on the need for translation is also transmitted through the programmable logic to the system performing the board translation.
The system uses several machine vision methods to analyze the sapwood. System does not base decision of the sapwood just one method, like many other systems. The shape is influenced by the shape of the board and the texture of the board. It is not necessary to cut the end of the wood.
Image analysis produces a directional decision in less than 0.2 seconds with excellent reliability.

StM Surface – Surface quality control
StM Surface is an Santa Margarita’s Measuring Core platform application, which uses machine vision to monitor surface quality. The applications versatile image analysis provides effective methods for supervision surface quality of the object, such as texture, surface shape, surface integrity, unevenness, coating, or dissemination. Stm Surface adapts to a variety of surface quality control targets, whether it be wood, metal, stone or paper. The StM Surface application is used inter alia for to control the adequacy of the adhesive applied between the veneers and the integrity of the veneer sheet. The application is easily adaptable and compatible with other applications and features of the StM Measuring Core development platform.
StM Dimension – dimension measurement
StM Dimension is an application based on Santa Margarita’s Measuring Core development platform, which monitors the correctness of a piece measured by machine vision. Image analysis gets in monitoring objects wanted elements, like corners and edges, then it calculates objects dimensions. Objects can be large or small. Scale and accuracy requirements can be reach selecting the appropriate shooting area, camera and optics.
Several measurable things can be retrieved from the same picture. Dimensions can also be retrieved from multiple directions and combined with each other if necessary. Furthermore objects size and shape, it can measurement missing parts size and shape. StM Dimension application are used, among others to measure the dimensions, oblique, and size of the pieces cut from the plywood board. It also checks the quality of stacking of edges of plywood boards, which is used to control the cutting edge of the edges using the StM Control add-on.
The application is easily adaptable and compatible with other applications and features of the StM Measuring Core development platform.
StM Control – control
StM Control component can be used to add control and communication features to any StM Measuring Core application. There are several connection options, including: ProfiNet, Modbus TCP / RTU, TCP / IP Client, TCP / IP Server, Serial or PLC based IO interface. Through the StM Control component, pure image analysis output data can be transferred to the target system. To the target system can also transfer processed control data from StM Measuring Core application, which has been constructed using image analysis results. StM Measuring Core application is not only measuring device, but it can also act as a data processor and, in accordance with the reasoning rules, produce a control command for the next process step. StM Control control and communication features are used for example under the guidance of the saw.
StM Color – Color Meter
StM Color color meter measures the L * a * b * color values of the product surface from the on-line manufacturing line. Typically, target values for the color to control the manufacturing process are defined for the product. However, color deviations between production batches caused by differences in raw materials or environmental conditions are possible. Also within the production batch, for example, due to a hardware failure in the paint step, color deviations can be significant. Effective quality control improves customer satisfaction and reduces costs.
StM Text – optical character recognition
StM Text is an application based on the Measuring Core platform of Santa Margarita, which uses machine vision to control the correctness of the text. Image analysis gets numbers and letters from monitored item.There can be many variety of usable items. Text can be in body, packaging, or even on the car registration plate, such as the ACCO access control in our product.
StM Xhance – NDT X-ray image analysis
StM Xhance is software that can help improve nondestructive testing methods for X-ray imaging (NDT). Xhance software automatically attempts to improve X-ray images of welds, castings, or materials so that cracks, distortion, inclusions and other deviations are better distinguished from original image. StM Xhance is software that is independent of imaging equipment. Xhance automatically opens tif-format images that X-ray machine has saved on directory. The opened image is automatically subjected to image enhancement measures that emphasize the deviations to be found. Xhance software’s image processing features, doesn’t wasting any information.Original image can be always available beside edit image. The operator has ability to adjust contrast and brightness of images in Xhance interface. Information about project, image and scan can be stored for each image in XML format. At the same time, the original and customized image is saved with all image processing parameters to ensure repeatability.
Xhance software is used for example in weld line of metal pipes for checking weld seams.
Customized machine vision or measurement application
Do you need a machine vision or measurement solution to one of the problems that StM Measuring Core applications described above do not yet cover. Contact us to find a solution to the problem together. We are ready and willing to develop new innovative applications in the field of measurement and machine vision.
StM Measuring Core development platform provides us with a good starting point for cost-effective design and development of new applications.
